Masking Dots Lift During Conformal Coating
Why small circular masking features can move, float or release during conformal coating application
Bulletin Category: Masking process control | Typical Environments: PCB conformal coating, selective coating, batch spray, dip coating, masking dots, test points, via protection and keep-out areas
Masking dots are often used because they are fast, clean and convenient. However, they are also one of the easiest masking materials to underestimate. A small dot can appear correctly placed before coating, but still lift, curl, float or move during the process.
When this happens, coating can enter the protected area, form a ridge around the dot, leave exposed copper or contaminate contact points after de-masking. The problem is rarely just the dot itself. It is usually a combination of surface condition, adhesive contact, coating wetting, solvent attack, spray pressure, cure behaviour and operator handling.
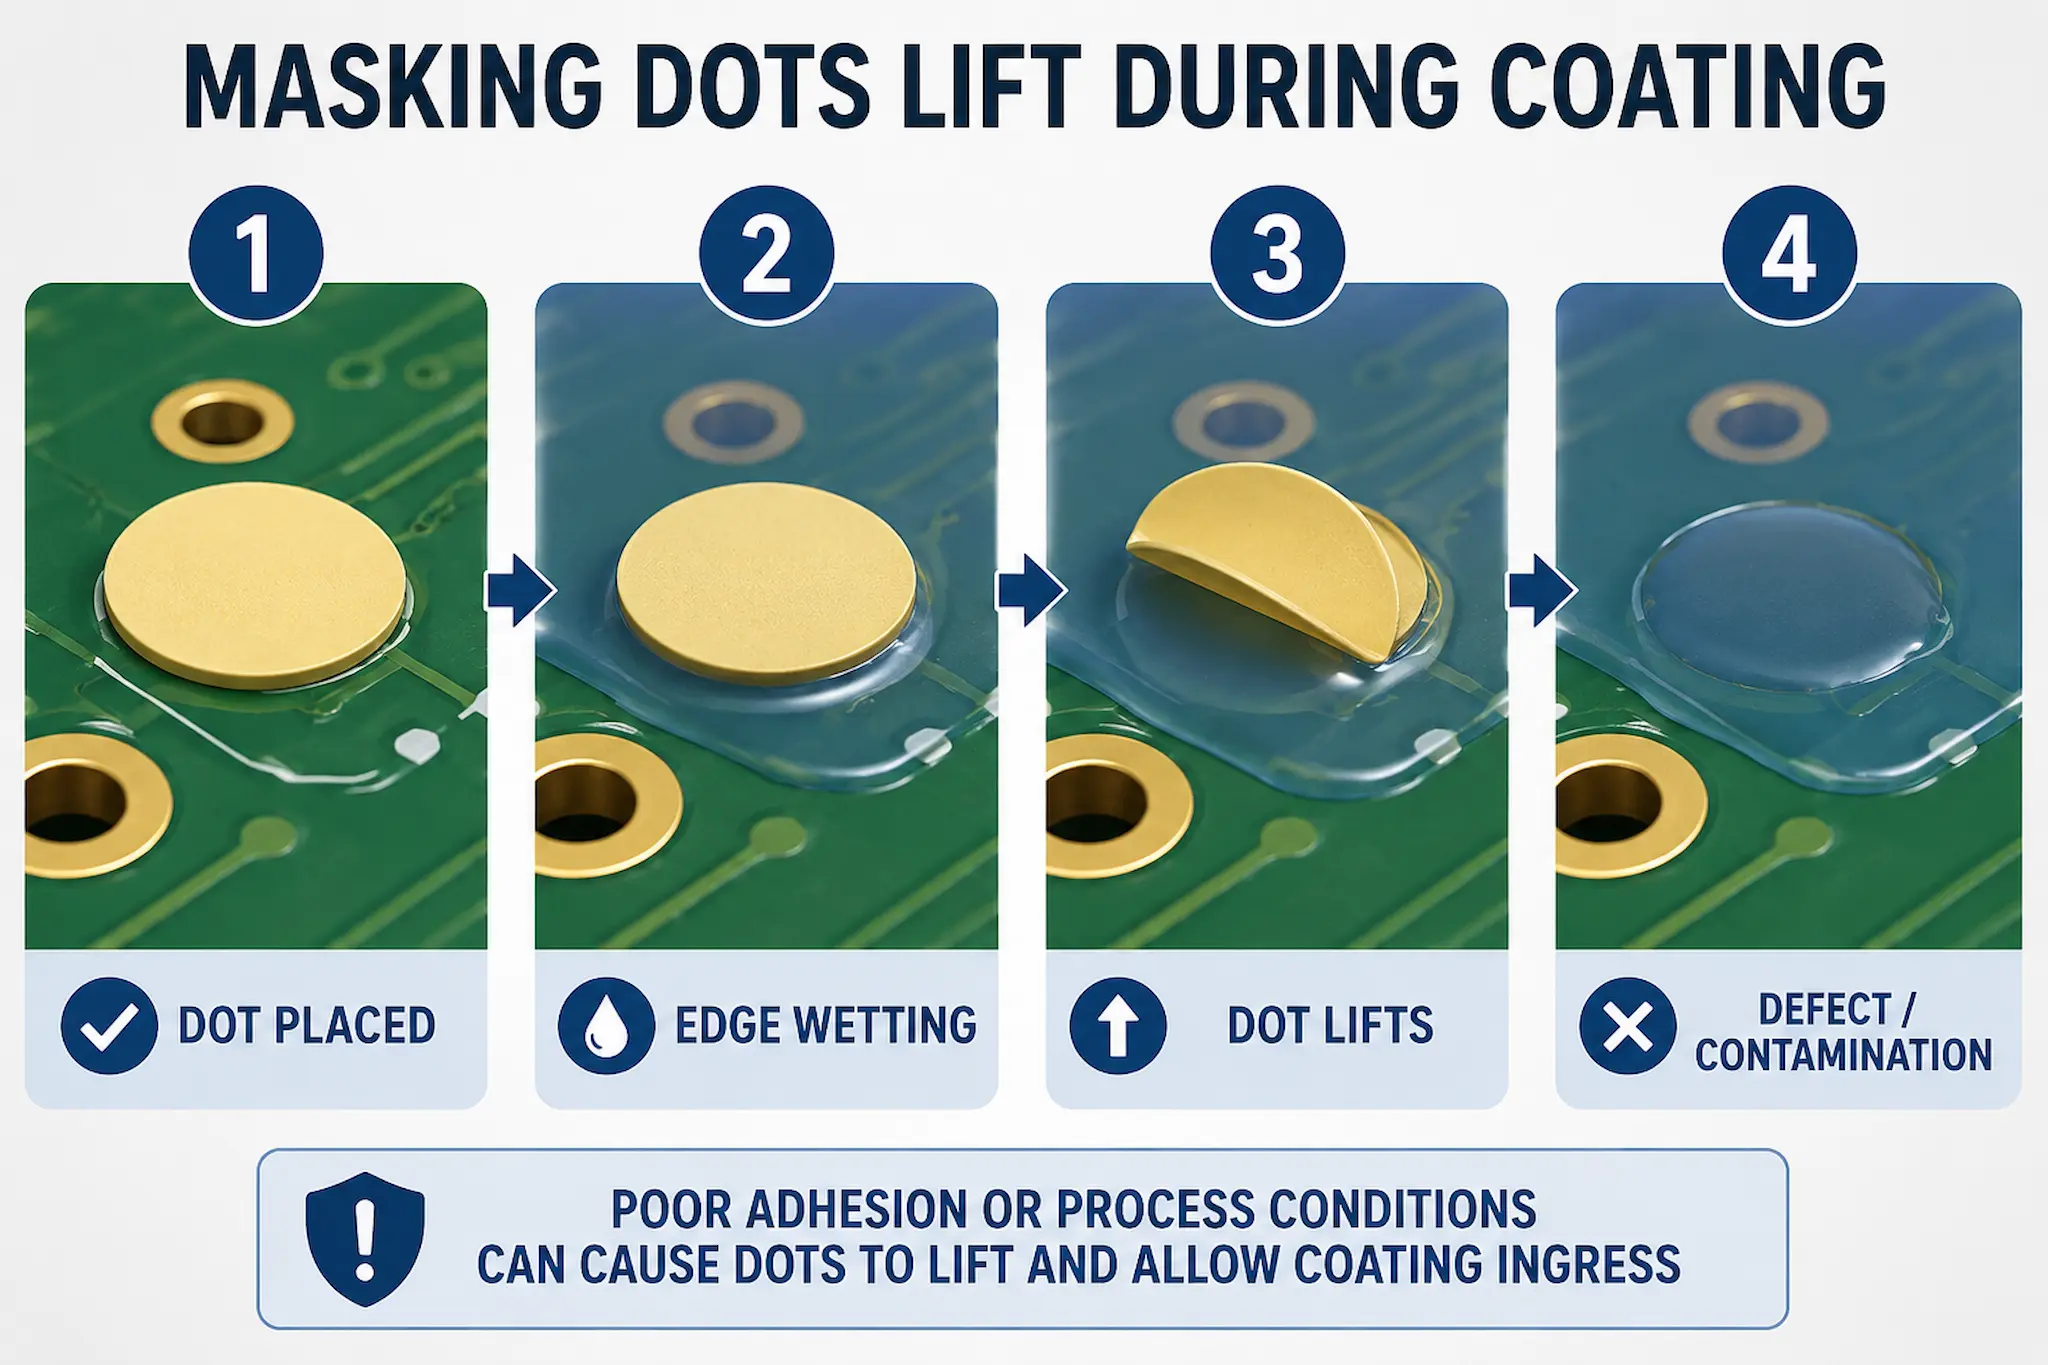
Simple illustration showing how a masking dot can lift during conformal coating, allowing coating ingress and creating contamination defects.
Engineering observation
Masking dots often fail because they have a very small bonding area compared with the forces acting on them during coating. The adhesive only has a limited edge seal, and once liquid coating starts to wet or pull at the perimeter, the dot can begin to release.
This is more likely when the dot is applied over flux residue, fingerprint contamination, solder mask texture, raised copper, uneven surfaces, sharp test-point edges, or areas that have not been properly cleaned before masking.
Simple production test: if a masking dot can be moved sideways with light finger pressure after application, it should not be trusted as a reliable coating barrier.
Why masking dots lift during coating
Poor surface contact
Residues, moisture, oils, silicone contamination or solder mask texture reduce adhesive wet-out and allow the coating to attack the dot edge.
Edge wetting
Low-viscosity coating can wick under the dot edge, lifting it or leaving a contaminated ring after removal.
Spray force
High atomisation pressure, close spray distance or direct spray angle can physically disturb small dots.
Solvent softening
Some adhesives soften or lose tack when exposed to aggressive coating solvents or long wet dwell times.
Visual process guide
①
Dot placed
Looks correct before coating
②
Edge attacked
Coating wets the perimeter
③
Dot lifts
Adhesive loses full contact
④
Defect created
Coating enters the keep-out area
The key control point is not simply placing the dot correctly. It is ensuring that the dot remains sealed throughout coating, flash-off, handling and cure.
Practical findings
- Small dots are more sensitive than large masks because the edge-to-area ratio is high.
- Raised or uneven features increase risk because the adhesive cannot form a continuous seal.
- Direct spray onto the dot edge increases lifting especially with high pressure or close nozzle distance.
- Wet coating dwell time matters because the adhesive is exposed before the film stabilises.
- Dot removal can create secondary defects if coating bridges over the dot edge and tears during de-mask.
Process note
A masking dot that survives placement but fails during coating is still a process failure. Dot adhesion should be checked after application, but the coating method must also be reviewed. Spray pressure, angle, film build, solvent strength and dwell time can all turn a marginally acceptable dot into a coating defect.
Recommended actions
- Clean or verify the surface condition before applying dots, especially around test points, vias and connector-adjacent areas.
- Apply dots with firm, even pressure so the adhesive wets the surface fully.
- Avoid touching the adhesive surface during handling and placement.
- Check for movement after placement using a light edge or sideways pressure check where appropriate.
- Review spray angle and pressure so coating is not driven directly into the dot edge.
- Control coating thickness around dots to reduce bridging and tearing during de-mask.
- Inspect protected areas after de-masking for edge bleed, exposed copper, coating rings or torn coating.
- Escalate recurring failures to a masking boot, tape system, custom die-cut mask or process change rather than repeatedly accepting rework.
Escalation point
If masking dots repeatedly lift on the same feature, the issue should not be treated as an operator placement problem alone. The feature may require a different masking method, a different adhesive material, a surface preparation step, a coating-process change or a redesigned masking approach.
Related guidance
Need help reducing masking dot failures?
SCH Services supports conformal coating masking through process review, masking material selection, operator training, coating services and practical defect investigation. If masking dots are lifting, moving or creating repeat defects, the best solution may be a controlled masking method rather than repeated touch-up and rework.
Why Choose SCH Services?
- Production experience: SCH works with conformal coating masking issues in real coating environments, not just in theory.
- Practical defect understanding: We connect masking behaviour, coating application, de-masking and inspection into one controlled process.
- Training and support: We help operators and engineers understand why masking failures happen and how to prevent repeat defects.
- Solution-led approach: We can support masking dots, tapes, boots, custom masking shapes, process reviews and coating-service implementation.
Disclaimer: This bulletin is general technical guidance only. Final masking material selection, process parameters, coating compatibility and inspection criteria must be validated against the specific PCB design, coating material, customer requirements and applicable production standards.