Conformal Coating Defects Hub
Conformal coating defects can undermine PCB protection, reduce insulation resistance, and cause costly rework or field failures. This hub is the overview of common defect mechanisms. Use the index below to jump to the right mechanism section, then open the dedicated technical article for each defect.
This Defects Hub sits within SCH’s wider knowledge framework, linking coating failures back to process control, masking strategy, and inspection and quality requirements. Understanding defects in isolation is rarely effective — prevention depends on controlling the upstream process.
Some repeat defect patterns are also driven by handling, packaging or environmental exposure outside the coating line, which is explored further in Why ESD Protection Fails in Data Centres.
Related hubs (when defects are symptoms, not root cause):
- Processes Hub – viscosity, setup, cure and control items that commonly create defects.
- Masking Hub – leakage, edge lift and residue problems often start here.
- Humidity vs Condensation – condensation + ionics drives corrosion/ECM more than “high humidity” alone.
- Inspection & Quality Hub – acceptance criteria and what to verify before rework.
- Why ESD Protection Fails in Data Centres – useful where handling, storage, packaging or facility conditions are contributing to defects rather than the coating process itself.
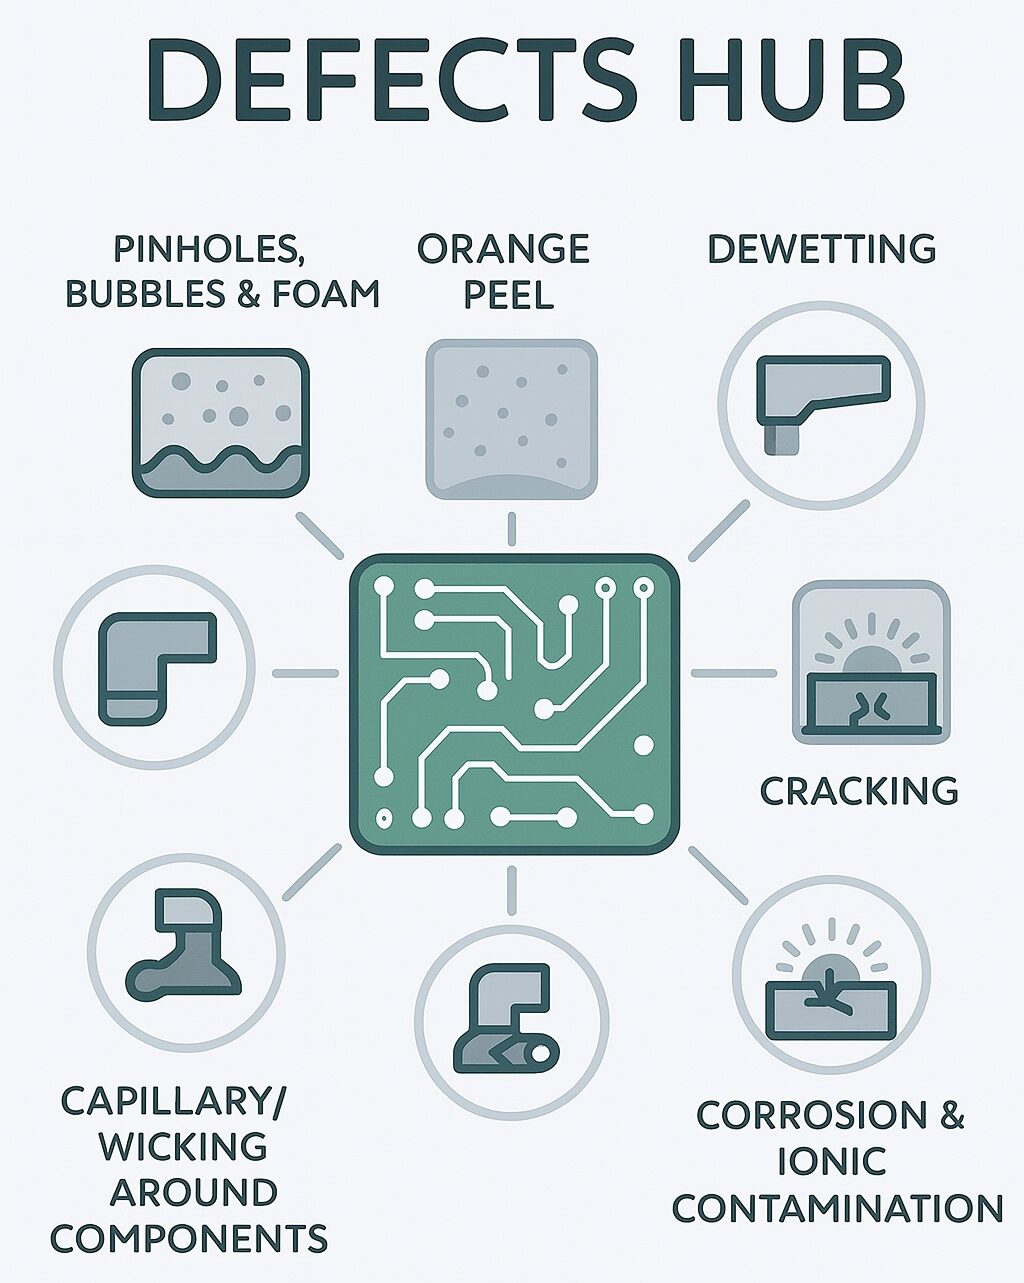
Defect Index
Use these sections for internal linking (e.g., to reference “Adhesion & Interface Failures” from an Insight post). Each defect row provides: 🔗 jump to the summary card on this page, and ↗ open the full technical article.
Start Here: Masking & Troubleshooting (Root Cause Control)
These pages stop repeat defects by improving diagnosis and boundary control before you chase chemistry or cure settings.
| Page | Jump | Article |
|---|---|---|
| Masking – Root Cause of Many Coating Defects | 🔗 | ↗ |
| Defect Identification Guide (Symptom-Based Routing) | 🔗 | ↗ |
| Top Conformal Coating Failure Mechanisms (Causes & Prevention) | 🔗 | ↗ |
| Troubleshooting Decision Tree (Diagnosis Flow) | 🔗 | ↗ |
Coverage & Boundary Failures (Where coating should / shouldn’t be)
These defects are about missing protection, wrong-area coating, and geometry-driven deposition.
| Defect | Jump | Article |
|---|---|---|
| Insufficient Coverage & Shadowing | 🔗 | ↗ |
| Coating Ingress into Keep-Out Areas | 🔗 | ↗ |
| Bridging & Webbing | 🔗 | ↗ |
| Capillary / Wicking Around Components | 🔗 | ↗ |
Flow & Finish Defects (How the wet film behaved)
These are controlled by viscosity, atomisation, flash-off discipline, and surface energy stability.
| Defect | Jump | Article |
|---|---|---|
| Runs, Sags & Curtains | 🔗 | ↗ |
| Pooling & Puddling | 🔗 | ↗ |
| Orange Peel | 🔗 | ↗ |
| Texture & Finish Defects (Router) | 🔗 | ↗ |
| Blooming & Surface Residue | 🔗 | ↗ |
| Fish-Eyes & Craters | 🔗 | ↗ |
| Dust, Fibres & FOD | 🔗 | ↗ |
Cure-State & Film Formation (How the coating cured and formed a film)
These defects appear during cure or after cure because solvent loss, moisture, cure energy, and recoat timing were not controlled.
| Defect | Jump | Article |
|---|---|---|
| Pinholes, Bubbles & Foam | 🔗 | ↗ |
| Bubbles After Cure (Outgassing / Blisters) | 🔗 | ↗ |
| Tacky / Soft-Cured (Under-Cure) | 🔗 | ↗ |
| Brittleness / Over-Cured Coating | 🔗 | ↗ |
| Wrinkling (Recoating / Intercoat Defects) | 🔗 | ↗ |
| Haze, Whitening & Blushing | 🔗 | ↗ |
Adhesion & Interface Failures (When the coating lifts or separates)
Use this section for internal linking when you’re discussing low surface energy materials, contamination transfer, peel/lift, and boundary failures.
| Defect | Jump | Article |
|---|---|---|
| Poor Adhesion on Plastics / Connector Bodies | 🔗 | ↗ |
| Mask-Edge Lift & De-mask Damage | 🔗 | ↗ |
| De-wetting | 🔗 | ↗ |
| Delamination | 🔗 | ↗ |
| Intercoat Adhesion Failure (Recoat / Touch-Up) | 🔗 | ↗ |
Internal link anchor for Insights: use /knowledge-hub/technical-articles/conformal-coating-defects-hub/#adhesion-interface-failures
Reliability, Electrochemical & Chemical Mechanisms (Long-term failure drivers)
These failures show up late and are often misattributed to “coating quality” when the real cause is ions, moisture pathways, bias, or excessive mechanical/thermal strain.
| Defect / Mechanism | Jump | Article |
|---|---|---|
| Cracking | 🔗 | ↗ |
| SIR Failures & Leakage Under Coating | 🔗 | ↗ |
| Electrochemical Migration & Dendrite Growth | 🔗 | ↗ |
| CAF Under Coating / Under Solder Mask | 🔗 | ↗ |
| Corrosion & Ionic Contamination | 🔗 | ↗ |
| Solvent Attack & Substrate Damage | 🔗 | ↗ |
Acceptance, Repair & Root Cause Control (Governance that stops repeat defects)
These pages stop the “touch-up → escape → strip & recoat” loop by enforcing consistent decision rules and verification.
| Page | Jump | Article |
|---|---|---|
| Defect Acceptance & Repair Rules (Touch-up vs Strip & Recoat) | 🔗 | ↗ |
| Top 10 Root Causes of Conformal Coating Defects | 🔗 | ↗ |
Masking – Root Cause of Many Conformal Coating Defects
A significant proportion of conformal coating defects originate from masking decisions rather than coating chemistry or application settings. Defects typically occur at boundaries where coating is intentionally restricted, including connectors, test points, interfaces, and defined keep-out zones.
Because masking defines coating boundaries, it must be treated as a controlled process rather than a consumable choice. This is covered in detail in the Masking Hub.
Common masking-related failure mechanisms include coating ingress into prohibited areas, coating removal during de-masking, residue transfer from masking materials, and incomplete touch-up after mask removal.
- Ensure masking methods match the function (shield vs sealed barrier).
- Control fit, sealing, and placement of tapes, boots, and custom shapes.
- Define de-masking timing, technique, and mandatory post-removal inspection.
- Apply clear rules for operator touch-up versus escalation.
Defect Identification Guide (Symptom-Based Routing)
Use this guide when you know what you are seeing but not yet what to call it. It routes observable symptoms (appearance, location logic and electrical behaviour) to the correct defect mechanism so you can avoid misdiagnosis and repeat rework loops.
- Route finish symptoms (orange peel, craters, residue, haze) to the correct film-formation mechanism.
- Route boundary and masking symptoms (ingress, edge lift, touch-up errors) to the correct root cause.
- Route reliability symptoms (SIR leakage, ECM/dendrites, corrosion, CAF) to the correct failure mechanism and test strategy.
Top Conformal Coating Failure Mechanisms
This article provides a practical troubleshooting overview of the most common conformal coating failure mechanisms, including de-wetting, bubbles, pinholes, cracking, delamination, corrosion, edge pullback and coating wicking into connectors.
Use it when you need to connect visible defects to likely root causes and prevention routes before deciding whether to accept, touch-up, recoat, strip or reassess the coating strategy.
- Identify the visible failure mechanism.
- Link the defect to likely process causes.
- Use prevention actions to stop repeat coating failures.
Troubleshooting Decision Tree (Diagnosis Flow)
Use the decision tree when you need a fast, structured diagnostic sequence (symptoms → timing → location → electrical behaviour) before you decide whether to accept, touch-up, locally recoat, or strip and recoat.
- Start with where the defect is (boundary/keep-out vs open field vs under components).
- Then confirm when it appeared (wet, during flash, during cure, after cure, or in service).
- Finally confirm risk & verification (can you prove performance with inspection/testing?).
Insufficient Coverage & Shadowing
Thin or missing coating occurs when tall components, dense assemblies, or approach angles prevent uniform deposition. The result is UV weak zones, missed areas (“holidays”), and under-built coverage behind components.
- Optimise spray angle, distance, and pathing around tall parts.
- Use multiple light passes to eliminate shadow zones without over-wetting.
- Verify coverage with UV inspection and defined acceptance rules.
Coating Ingress into Keep-Out Areas
Coating enters prohibited zones such as connectors, test pads, mating faces, and contact points. This is frequently a masking boundary failure or a selective-pathing oversight, and can directly cause functional failures.
- Define keep-outs clearly and select the correct masking method (shield vs sealed barrier).
- Validate selective recipes near connectors and tight interfaces.
- Mandate post-de-mask inspection and touch-up rules.
Bridging & Webbing
A continuous coating film spans between adjacent pins, pads, or features in tight-clearance areas. Bridging can create unwanted insulation paths, breach RF keep-outs, and thick fillets can become stress concentrators that initiate cracking.
- Avoid over-wet passes and keep-wet overlaps in fine-pitch areas.
- Control viscosity and open time so the film locks before spanning gaps.
- If cracking initiates at bridged or over-built areas, review cracking mechanisms.
Capillary / Wicking Around Components
Capillary action draws coating into gaps/under parts and along interfaces, pulling film away from open surfaces and creating thin/bare zones or meniscus lines that can impact function.
- Reduce over-wet deposits; stabilise viscosity and “keep-wet” behaviour.
- Optimise selective valve/needle height, overlap, and pathing near capillary-prone geometry.
- Use fixtures/masking/dams to block known capillary routes; qualify with representative gaps.
Runs, Sags & Curtains
Gravity-driven flow defects where an over-wet film moves before it can lock, leaving curtains, drips, or heavy edges and creating uneven thickness and cure.
- Use multiple light passes with defined flash-off; avoid loading vertical edges.
- Control viscosity/open time; reduce overlap and slow travel in high-risk zones.
- Hold orientation stable through flash and early cure to avoid migration.
Pooling & Puddling
Excess coating accumulates at low points, edges, or around component features. Although coverage can look complete, thick pooled films often trap solvent, cure unevenly, and increase the likelihood of cracking and long-term reliability failures.
- Build film with multiple light coats rather than a single heavy pass.
- Control viscosity and orientation during flash-off to reduce gravity-driven migration.
- Confirm thickness at low points and validate cure profile for thick sections.
Orange Peel
A dimpled texture driven by viscosity imbalance, spray atomisation issues, or low surface energy. Affects appearance and can correlate with poor levelling/edge definition.
- Tune solvent balance, gun distance, and fan width.
- Maintain substrate temperature and predictable surface energy.
- Use pattern boards to validate finish and recipe stability.
Texture & Finish Defects (Router)
Texture and finish defects include roughness, dry spray, poor levelling, surface residue and other finish issues that can be cosmetic, functional, or a warning sign of film-formation problems. This router page helps you identify the pattern and then route to the most relevant mechanism.
- Use this page when the surface looks “wrong” but the mechanism is not yet clear.
- Confirm whether the issue is texture (rough/dry spray/orange peel) or surface film (haze/residue/blooming).
- Stabilise recipe and environment first (viscosity, atomisation, flash-off, RH/temperature).
Blooming & Surface Residue
Blooming and surface residue appear as a hazy, waxy, greasy, powdery or sticky film on top of the cured coating. It is commonly linked to additive/plasticiser migration, solvent imbalance, incomplete cure, or contamination transfer.
- Check cure window stability and flash-off discipline first.
- Review contamination transfer points (masking, gloves, fixtures, compressed air).
- Confirm the issue is a surface film (not craters/pull-back or broad adhesion loss).
Fish-Eyes & Craters
Circular pull-back defects where the wet film retracts from local contamination or low-surface-energy spots, leaving rings, craters, or “holes” in coverage.
- Eliminate silicone/oil sources and validate cleaning/handling discipline.
- Control masking materials and gloves to avoid surface-energy transfer.
- Use a controlled rework workflow if defects are local; strip/recoat if widespread.
Dust, Fibres & FOD
Airborne or handling-related debris becomes embedded in the wet film and is locked into the cured coating. This can create leakage paths, weak zones, cosmetic rejects, or rework triggers.
- Control booth cleanliness, tack-off steps, and airflow management.
- Reduce handling after cleaning; define storage and transfer discipline.
- Inspect under UV and white light; define accept/rework rules by risk.
Pinholes, Bubbles & Foam
Gas entrapment during application, drying and curing leaves voids that weaken protection and allow moisture ingress. Common root causes: trapped solvent, high humidity, aggressive spray settings, or insufficient flash.
- Stabilise viscosity and flash times; avoid over-wet passes.
- Manage booth RH/temperature and atomisation pressure.
- Verify drying and curing processes to prevent residual volatiles.
Many void-related defects are only identified during inspection rather than application. The Inspection & Quality Hub explains how UV inspection, thickness measurement, and acceptance criteria expose these failures.
Bubbles After Cure (Outgassing / Blisters)
Bubbles after cure are defects where the coating can look acceptable at application, but bubbles, blisters, or raised domes become visible during cure or after curing. The mechanism is usually outgassing (vapours driven out of the PCB/assembly), solvent entrapment beneath a skinned surface, or moisture-driven vapour formation.
- Control flash-off and avoid skinning that traps volatiles beneath the surface.
- Audit moisture/outgassing risk (board dry-out, absorbed moisture, trapped solvents, under-component cavities).
- Stabilise film build and cure profile to prevent late-stage vapour expansion.
Tacky / Soft-Cured (Under-Cure)
Under-cured conformal coating remains soft or tacky when cure energy is insufficient or solvent remains trapped in the film. This increases contamination pickup, print-through, and long-term reliability risk.
- Confirm cure profile (time/temperature/UV dose) against the datasheet and real part temperature.
- Ensure flash-off is adequate; avoid sealing solvent beneath a skinned surface.
- Validate film build; thick sections can under-cure even if thin areas pass.
Brittleness / Over-Cured Coating
Over-cure can leave the film overly stiff and brittle, increasing the likelihood of cracking or crazing during thermal cycling, vibration, or mechanical stress — especially at thick build and sharp edges.
- Verify cure profile and avoid exceeding time/temperature windows.
- Control thickness and edge build; thick areas see higher cure stress.
- Match chemistry (Tg/flexibility) to the duty environment and strain levels.
Wrinkling (Recoating / Intercoat Defects)
Wrinkling is a film-formation defect where the cured surface develops ripples, ridges, or surface distortion instead of levelling smoothly. It is commonly driven by recoat timing errors, solvent attack on a partially cured layer, or cure-state mismatch between coats.
- Follow recoat windows; avoid recoating onto a skinned or partially cured film.
- Confirm solvent compatibility between layers and avoid aggressive solvent exposure.
- Where possible, use light scuff/activation steps (validated) before recoat.
Haze, Whitening & Blushing
A cloudy or milky finish caused by moisture–solvent interactions during drying or cure. It can correlate with trapped moisture, poor levelling, and performance risk depending on severity and chemistry.
- Control RH and temperature; stabilise booth conditions.
- Use correct flash-off and avoid heavy wet films in high humidity.
- Verify cure/dry profile and confirm accept/rework rules by severity.
Poor Adhesion on Plastics / Connector Bodies
Adhesion loss on plastics and connector bodies typically shows as peel-back, flaking, edge lift, or wipe-off. It is most commonly driven by low surface energy polymers, mould-release or silicone transfer, handling contamination, or incompatible coating chemistry.
- Confirm whether the defect is confined to plastics/connector bodies (strong clue for mechanism).
- Audit contamination transfer points (gloves, fixtures, compressed air, masking).
- Validate compatibility and (if required) controlled activation/primer steps.
Mask-Edge Lift & De-mask Damage
Mask-edge lift and de-mask damage occur when the coating tears, chips, peels, or lifts at masking boundaries during removal, leaving rough edges, exposed substrate, or adhesive residue. It is driven by mask selection/fit, removal timing/technique, edge stress, and adhesive interaction with the coating.
- Control de-mask timing and technique (don’t let masks “cold-weld” or over-cure into the edge).
- Use the right mask type for the boundary (barrier vs shield) and qualify adhesives.
- Define mandatory post-de-mask inspection and clear touch-up vs escalation rules.
De-wetting
The wet film pulls back into “islands,” leaving bare areas due to contamination or low surface energy (silicones / oils / surfactants). It can also be triggered by substrate chemistry issues (e.g., under-cured solder resist or inks).
- Improve cleaning; validate ionic and non-ionic residues.
- Control handling/masking to avoid silicone transfer.
- Where needed, qualify surface activation/primers for difficult substrates (within process control).
De-wetting is often a symptom of upstream contamination or substrate surface-energy problems rather than coating chemistry alone.
Delamination
Loss of adhesion between coating and substrate from poor prep, moisture, compatibility issues, or thermal/CTE stress. It often shows up first at mask edges during de-masking.
- Validate surface prep and primer/adhesion promoter compatibility.
- Control moisture (PCB/component bake where appropriate) and verify cure profiles.
- Use a controlled repair approach for local mask-edge lift; strip/recoat for widespread interface failure.
Intercoat Adhesion Failure (Recoating / Touch-Up)
Intercoat adhesion failure occurs when a second coat (or local touch-up) does not bond to the first, causing peel-back, flaking, edge lift, wrinkling, or delamination between layers. It is usually driven by recoat timing, partial cure state, surface contamination, or chemical incompatibility between coats.
- Follow recoat windows and define “clean-to-recoat” rules (no guessing).
- Prevent contamination between coats (handling, masking residues, dust/FOD, silicone transfer).
- Verify compatibility and avoid solvent attack on partially cured films.
Cracking
Fractures form when films are too thick, too stiff, or see high thermal strain (CTE mismatch, thermal shock/cycling), creating moisture pathways.
- Keep to spec thickness; manage flash-off, solvent loss, and cure ramp.
- Select chemistries with appropriate flexibility/Tg for the duty environment.
- Validate cure profile and thermal cycling against the product requirement.
SIR Failures & Leakage Under Coating
SIR (Surface Insulation Resistance) failures and leakage can occur even when coating coverage appears acceptable. Common drivers include moisture pathways, ionic contamination, thin film at edges/under components, and bias-driven leakage under humid conditions.
- Confirm cleanliness and ionic controls (process + verification).
- Audit edge coverage, capillary routes, and under-component entrapment risk.
- Define verification strategy (SIR/functional tests) before accepting “cosmetic” defects.
Electrochemical Migration & Dendrite Growth
Under moisture and electrical bias, metal ions can migrate across insulation gaps and form conductive dendrites, causing intermittent-to-hard shorts. Coating reduces risk, but does not eliminate it if ions and moisture are trapped under the film.
- Control ionic contamination and flux residues (upstream, not after the fact).
- Reduce moisture pathways (edge coverage, wicking routes, voids, cracking).
- Use the right verification tests for the environment (SIR / bias humidity where relevant).
CAF Under Coating / Under Solder Mask
Conductive Anodic Filament (CAF) growth is an internal laminate failure mechanism driven by moisture, bias, and susceptible resin/glass interfaces. Because CAF can occur within the PCB, conformal coating cannot “fix” CAF risk — but it can reduce external moisture ingress if edge sealing and cleanliness are controlled.
- Differentiate CAF (internal laminate) from surface ECM/dendrites (external).
- Control moisture exposure, board storage, and bake strategy where applicable.
- Escalate to OEM/PCB fabricator validation if CAF signatures are suspected.
Corrosion & Ionic Contamination
Residual ions plus moisture and bias can drive electrochemical migration and dendrites — among the most damaging failure modes.
- Qualify cleanliness (ROSE/IC/SIR as appropriate) and tighten process controls.
- Prevent moisture pathways and edge leakage; control entrapment under parts.
- Select chemistries with proven barrier performance for the environment.
Further guidance is available in the Inspection & Quality Hub, including ionic testing and verification strategy.
Solvent Attack & Substrate Damage
Solvent attack occurs when coating solvents soften, craze, swell, or dissolve sensitive substrates such as plastics, labels, inks, and solder mask. The result can be cosmetic damage, loss of markings, adhesion problems, or functional risk.
- Check substrate compatibility and confirm solvent resistance before production.
- Control dwell time and avoid over-wet exposure on sensitive areas.
- Where required, select alternative chemistries or barrier/primer approaches (validated).
Defect Acceptance & Repair Rules
Use this governance page to prevent rework loops. It defines a consistent decision funnel to classify defects by specification, criticality, defect type, location risk, and verification ability — then choose: accept, touch-up, local recoat, strip & recoat, or escalate.
- Start with the spec (IPC/contract/customer) and product criticality.
- Assess defect type + location (edge/keep-out/high voltage/high impedance zones carry higher risk).
- Only accept/touch-up when you can verify the outcome (inspection/testing).
Top 10 Root Causes of Conformal Coating Defects
Most coating defects are repeat failures driven by a small number of upstream causes. This page ranks the top causes seen in production and maps each to practical controls that prevent the touch-up → escape → strip & recoat loop.
- Masking discipline (boundaries, sealing, de-mask inspection).
- Cleanliness & contamination transfer (ionic + non-ionic).
- Thickness/film build control, flash-off discipline, and cure profiling.
Need Help Preventing or Solving Defects?
Whether you’re dealing with repeat coating failures, process variability, or NPI challenges, SCH can help you eliminate defects at their source — not just react to them.
🛠 Consultancy & Process Optimisation
- Root cause analysis for delamination, de-wetting, capillary wicking, contamination and cure-related defects.
- On-site or remote process audits and troubleshooting.
- NPI support — set up, validate and stabilise your process from day one.
- Improved masking, inspection and cleaning methods to reduce rework and scrap.
🎓 Technical Training for Your Team
- IPC-A-610 and IPC-CC-830 aligned inspection and best practice.
- Masking, de-masking and post-mask inspection discipline.
- Process control — thickness, viscosity, cleanliness and curing.
- Advanced modules on defect identification, RCA and repair.
Why Choose SCH Services?
Partnering with SCH Services means more than just outsourcing — you gain a complete, integrated platform for Conformal Coating, Parylene & ProShieldESD Solutions, alongside equipment, materials, and training, all backed by decades of hands-on expertise.
- ✈️ 25+ Years of Expertise – Specialists in coating technologies trusted worldwide.
- 🛠️ End-to-End Support – Selection of chemistry/process, masking strategies, inspection, and ProShieldESD integration.
- 📈 Scalable Solutions – From prototypes to high-volume production.
- 🌍 Global Reach – Responsive support across Europe, North America, and Asia.
- ✅ Proven Reliability – Consistent results across services, equipment, and materials.
📞 Call: +44 (0)1226 249019 | ✉ Email: sales@schservices.com | 💬 Contact Us ›