Masking Removal & Verification After Conformal Coating
Clean Removal, Clean Edges, and No Inspection Surprises
Masking is not finished when coating is applied. In conformal coating operations, a large proportion of defects are created during masking removal or missed during post-removal verification.
This stage directly determines whether keep-out areas remain clean and whether coating edges meet inspection standards. Poor removal technique or inconsistent verification introduces residue, edge damage, and latent reliability risks.
For upstream control of masking performance, see masking material selection and masking application best practices.
Where coating edges have already lifted or been damaged during removal, controlled rework may be required. See our guide to repairing lifted conformal coating edges for a structured approach.
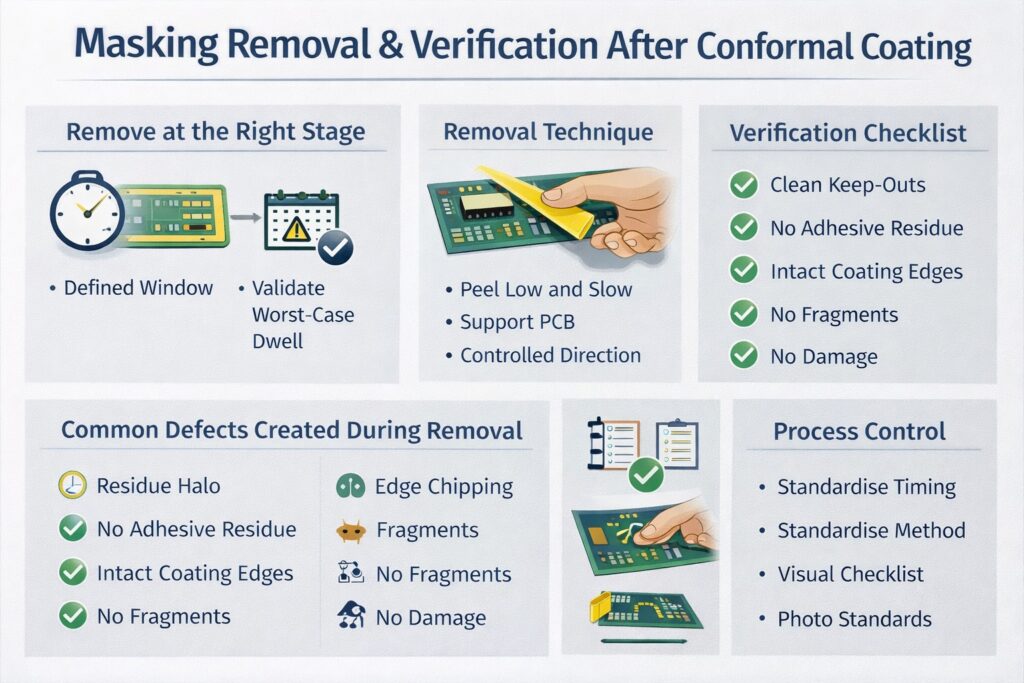
Checklist for clean masking removal and verification after conformal coating to prevent residue, leakage, and edge damage.
When to Remove Masking After Conformal Coating
Removal timing is a process decision. Remove too early and coating edges can be disturbed. Remove too late and the risk of tearing, residue, or edge chipping increases.
Control the removal window
- Define the removal stage in your work instruction (after coat, flash-off, or cure)
- Validate worst-case dwell time — long queues behave differently to ideal conditions
- Maintain consistency — timing variation drives edge and residue variation
If removal behaviour changes between batches or shifts, the process window is not controlled.
Removal Technique That Protects Coating Edges
Masking removal is a controlled step. Poor technique can immediately turn an acceptable coating result into rework.
Best-practice removal method
- Peel low and slow — pull back on itself to protect coating edges
- Support the assembly — avoid flexing during removal
- Control peel direction — avoid dragging debris across keep-outs
- Avoid snapping — this creates edge damage and fragments
Material-specific behaviour
- Tapes: steady peel to avoid tearing and micro-fragments
- Dots and shapes: lift cleanly using controlled removal, not scraping
- Reusable boots: remove straight-off and check for prior ingress
Important: Removal behaviour is influenced by more than operator technique. Coating adhesion, film thickness, cure state, and dwell time all affect how easily masking can be removed and how stable the coating edge remains.
Even with correct technique, coatings with poor adhesion, excessive thickness, or extended dwell times can tear, lift, or chip at boundaries during masking removal. These are process and material interactions, not simply operator error.
What to Do When Coating Edges Lift or Tear
When coating edges lift or tear during masking removal, there is no single “correct” fix. The appropriate response depends on coating type, defect severity, and acceptance criteria.
In production environments, four approaches are typically used:
- Accept as-is — where the defect does not affect function, clearance, or specification compliance
- Cut back the coating — commonly used for Parylene, where controlled mechanical removal can redefine the boundary. Parylene is not solvent-reactive, so mechanical methods are typically required
- Reapply coating locally — using a brush to restore coverage where coating has been removed or damaged. This is also a standard repair method for localised Parylene lifting
- Controlled reflow using solvent and low-lint swabs — softening the coating locally to re-form a clean edge without full rework
The correct choice depends on process capability and acceptance criteria. Attempting to fix all defects using a single method often introduces more issues than it resolves.
For a structured approach to controlled edge repair using low-lint swabs, see repairing lifted conformal coating edges.
Verification Checklist After Masking Removal
Verification must be fast, repeatable, and based on defined accept/reject criteria. This is where many inspection escapes originate.
Check these points every time
- Keep-out areas clean — no haze, overspray, or partial coating
- No adhesive residue — no smearing or contamination film
- Edges intact — no lifting, chipping, or ragged boundaries
- No leakage — no capillary creep under mask edges
- No fragments — no fibres, remnants, or debris
- No removal damage — pads, joints, plastics intact
Use photo standards to remove subjectivity and ensure consistent inspection.
Common Defects Created During Masking Removal
- Residue halos → lead to de-wetting or adhesion issues
- Edge chipping or lift → caused by poor peel technique or cure condition
- Mask fragments → contamination and inspection rejects
- Leakage revealed post-removal → indicates sealing or application failure
For root causes and prevention, see masking-related conformal coating defects.
Process Control: Making Removal Repeatable
If removal results vary, the masking process is not controlled. Stability comes from standardisation.
- Define timing — validated removal window
- Define method — peel angle, direction, technique
- Define inspection — checklist and photo standards
- Define escalation — clear actions for residue or leakage
Removal and verification are not secondary steps — they directly control yield and reliability.
Related Masking Guidance
Why Choose SCH Services?
Partnering with SCH Services means more than just outsourcing — you gain a complete, integrated platform for Conformal Coating, Parylene and ProShieldESD, supported by materials, equipment and training.
- ✔ 25+ years of coating expertise
- ✔ End-to-end process support
- ✔ Scalable production capability
- ✔ Global technical support
- ✔ Proven reliability across industries
📞 +44 (0)1226 249019 | ✉ sales@schservices.com | 💬 Contact Us